CHICKEN WITH TOMATO BASIL CREAM SAUCE

 chicken cream sauce
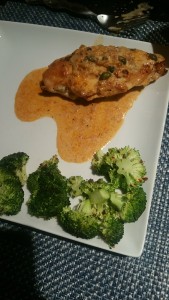
 Instead of going out to eat and loading up on calories, skip the bread basket and make this quick creamy chicken dish at home!  To control your calorie intake, limit the sauce spoonfuls and pasta intake.
INGREDIENTS
  • 4 boneless skinless chicken breasts (or thighs)
  • salt and pepper
  • 1 cup chicken broth
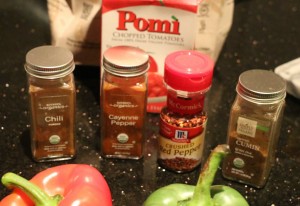
  • ¼ cup sun-dried tomato basil pesto
  • 1 tablespoon minced garlic
  • ½ teaspoon red pepper flakes (or more to taste)
  • 1 tablespoon olive oil
  • ⅓ cup diced red onions (or shallots)
  • 1 tablespoon salted butter
  • ½ cup heavy cream
  • 1 tablespoon capers (optional)
  • 2 tablespoon chopped parsley or basil
INSTRUCTIONS
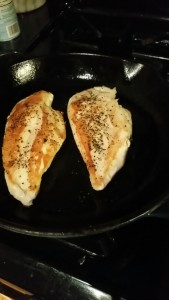
  1. Using a mallet, pound down the chicken breasts/thighs into 1 inch thickness. Sprinkle a pinch of salt and pepper on both sides of the chicken.
  2. In a 2 cup measuring cup or a small bowl, combine the chicken broth, pesto, garlic, and red pepper flakes. Stir to combine until the pesto is more or less dissolved.
  3. Position a rack in the lower third of the oven and preheat the oven to 350ºF.
  4. Heat the olive oil in a large oven-safe skillet over medium high heat. Add the chicken and allow to brown on both sides of 4-6 minutes per side. Remove from heat and place in oven for 20 minutes
  5. Reduce the flame to medium, add the onions to the skillet and allow the onions to cook for 1 minute before adding in the chicken broth mixture. Using a whisk, scrape the bottom of the pan so all the brown bits are loosened. Let sauce reduce for about 8-10 minutes or until until about ⅓ of the sauce remains.
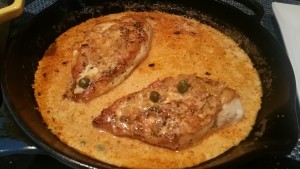
  6. When the sauce has thickened, remove from the flame, add the butter and whisk until it melts completely. With the skillet off the flame, add the heavy cream, whisk to combine.
  7. Place the skillet back of over the flame for just 30 seconds. DO NOT allow the sauce to boil. Remove from heat, add the chicken back into the pan and drizzle the sauce over the chicken. Add the capers.
  8. Place the skillet in the oven for 5-8 minutes or until the chicken is completely cooked through. Top with chopped parsley or basil and serve warm.

Snapchat-693165957190643057

Recipe from: http://littlespicejar.com/one-skillet-chicken-with-tomato-basil-cream-sauce/

Garlic Brown Sugar Chicken

Brown sugar is my new favorite ingredient for a chicken rub.  This is one of my new favorite recipes!
Ingredients 
  • 2-4 chicken breasts
  • salt and pepper, to taste
  • 2-3 tablespoons unsalted butter, divided
  • 2-4 cloves garlic, minced
  • 1/4 cup brown sugar, packed
  • 1 tablespoon honey
  • 1/2 teaspoon dried oregano
  • 1/4 teaspoon dried thyme
  • 1/4 teaspoon dried basil
  • 2 tablespoons chopped fresh parsley leaves
  • 1 teaspoon sweet paprika
  • 1 teaspoon smokey paprika
  • 1/2 cup chicken broth

Instructions

  • Preheat oven to 400 degrees F.
  • Season chicken with salt and pepper, to taste.
  • Add grapeseed oil over medium high heat. Add chicken and sear both sides until golden brown, about 4-6 minutes per side; set aside.
  • Add additional oil to skillet if needed and add garlic, and cook, stirring frequently, about 1-2 minutes. Remove from heat.
  • Stir in brown sugar, honey, oregano, thyme and basil until mixture thickens, about 2 minutes.  Use a spatula and coat each chicken breast with a small amount of the mixture.
  • Sprinkle the paprika on top of each chicken piece.
  • Line the bottom of a casserole dish with foil and added 1/2 cup of chicken broth or stock.
  • Place into oven and roast until completely cooked through, reaching an internal temperature of 175 degrees F, about 25-30 minutes.
  • Serve chicken immediately, garnished with parsley, if desired.
The brown sugar melted a bit from the top and made a sauce with chicken breast and the chicken skin tasted like candy!
Inspired from the below:

Chile Garlic BBQ Salmon

salmon_1

Let me start this post off by saying I am not by any means a fan of fish.  Until recently, I avoided any type of fish like the plague.  However, in an effort to incorporate healthier options into my diet, I started to learn more about specific fish, starting with salmon.  It took me a few recipes to find one that I really liked, but this by far is my favorite.  I also have started buying the Icelandic salmon at Whole Foods which has a more mild taste compared with the Atlantic Salmon.  They also more recently dropped the price to $12.99 pound.

First aspect I had to learn is how do I even buy/ask for salmon?  When I go to the counter, I have learned its better to have them cut the specific portion you want versus taking the pre-cut options.  The fish always seems more fresh when going this route.  Thus, I use the following steps:

  1. Ask for (2) 4oz pieces of fish, with the skin removed.
  2. I also specify when they weigh the fish, it will be 5oz with the skin
  3. Then I ask for the fish to be similar in size and thickness to ensure they cook the same.  4oz is about 1/3 pound for comparison.  4oz is also the recommended serving size from my nutritionist.
  4. Often the person working the counter will ask if there is a specific piece I want, I just request the non “pre-cut” options.  The lighter color versus deep read seems to be my preference as well.
  5. I also only buy fish when I am going to use it that day to ensure it is as fresh as possible.

salmon_4 salmon_5

**Pre-cut options you see on far right, which tend to be the atlantic salmon options at Whole Foods and generally 6oz – 8oz.  All of the above Icelandic salmon look fresh and not too red in color for my preference.

Ingredients:
(2) 4oz pieces salmon, skin removed
Aluminum foil, to make clean up easier
1 large garlic cloves, minced (or used dried garlic)                                                       1 Tbsp ginger root, chopped (you can omit this)
3 Tbsp soy sauce or Worcestershire sauce (use up to 1/4 cup, which is 4 Tbsp)
1 Tbsp Chile sauce (I love the below brand!)
http://organicvillefoods.com/products/condiments/organic-chili-sauce/
1 lime, juiced (Start with 1/2 lime and add based on taste)
1 lime, zested (same lime as above, just zest the skin first)
1 Tbsp brown sugar
3 green onions, chopped (these are optional, but I really loved them!)

**I also sprinkle up to 1 tsp paprika on the salmon as part of the rub

Optional: Red peppers to place on top
**I generally serve this with either sweet potatoes and roasted broccoli or substitute potatoes for Couscous or rice.  I have also served with spinach cooked with chorizo and onions.  (I will add a link for this recipe too!)

Since this is a light meal, feel free to serve with a desert of fruit or add an extra vegetable.

salmon_2

Directions:

  1. Preheat oven to either 425 or turn broiler on your oven.

2. Place the salmon on aluminum foil in a shallow (oven proof) baking sheet.

3. In a small bowl, combine soy sauce, chile sauce, ginger (optional) and garlic.  Mix in lime juice, lime zest, and brown sugar.  Brush over both sides of salmon.  If needed, add more chile sauce to marinade.  To ensure a nice sear on the salmon, I do not cover with aluminum foil.  Only cover if you use a grill. Before putting into the oven, cut up the red peppers into strips and add on top of the salmon.

4. Bake either 425 for 20 minutes or broil for 10-13 minutes.  Salmon is done when it begins to flake on the sides.  Let sit for 2-3 minutes, serve and pour any extra juices from the foil on top of the fish.  Serve with rice and vegetables.

salmon_3

Danny taste tested and approved! 🙂

If I don’t have all the ingredients on hand, I make sure I at least have chile sauce, paprika, worcestershire sauce, garlic, salt and pepper for a quick, 15 minute meal.


Golden Chicken & Autumn Vegetables

One of my favorite, simple, recipes I make about once a month for a quick and easy weeknight dinner!  I have added additional notes below regarding cooking chicken in the skillet to ensure you get a golden brown sear.  I also cook the chicken, covered for longer than the original recipe when using thicker chicken breasts.

Ingredients:
1 Tbsp grape seed oil
1/2 medium sweet or yellow onion, chopped
2 large garlic cloves, minced (or used dried garlic)
4 skinless, boneless chicken breast halves
2-3 cups of chicken broth or stock
1/2 tsp dried rosemary
1 fresh rosemary stem (optional)
1/4 tsp dried thyme
1 large sweet potato. cut into 1/2 inch pieces
2 cups fresh, whole green beans
4-5 carrots, peeled

Heat oil in a dutch oven over medium heat.  Add the onion and cook until softened and lightly brown.  While the onion is cooking, pound chicken with a mallet to ensure all chicken breasts are of even thickness.  If one chicken is slightly thicker, start cooking this one 2-3 minutes before the others.  Quick Tip:  I often cut off the tender and cook separately to help evenly cook the meat.  Add salt & pepper to taste and sprinkle dried garlic on each side of the breasts.  Make sure the skillet is hot before adding to the pan.

Tip: If you have limited space in your dutch oven, you can cut the breasts in half before you begin searing.

Important Note: The chicken should only be flipped once, there are two ways I can tell when chicken breasts are ready to be flipped:  First, the chicken will begin to cook through and you will see the white, cooked color begin to appear around the edges of the chicken on the uncooked side.  Second, the chicken breasts will stick to the pan while the meat sears, creating the golden brown color.  Once I begin to see the white along the edges I will “nudge” the meat to see if it still sticking to the pan.  Once the meat moves easily in the pan, I prefer to use a spoon (thongs can tear the chicken) or a spatula to flip the meat.  As a rule of thumb I generally cook each side 5-7 minutes depending on thickness.

Snapchat-6337667003485312195

Tip for Softer Vegetables:  While I am searing the chicken, I bring water to a boil and pre-cook first the carrots and then also the green beans.  The sweet potatoes I prefer to not overcook as they will begin to fall apart.  This can shorten your overall cooking time and help ensure the chicken isn’t overcooked.

Remove chicken and set aside.  If vegetables were pre-cooked, drain water, do not rinse. Increase the heat to high for the dutch oven and stir in broth (I start with 2 cups, but add more if needed), garlic, rosemary, thyme, potatoes, carrots and green beans.  When using fresh rosemary and thyme, remove from the stems and mince/chop.  Heat until the liquid begins to boil and cook 5-7 minutes.   Tip: To fit the breasts back in the pan with the vegetables, I cut them in half.  This will have the juices run out so if possible cut in half when you begin searing for best results.  Last step: Add the chicken breasts back to the dutch oven, cover and reduce heat to low.  Cook for an additional 15-20 minutes until chicken is cooked through and potatoes are tender.

Serve immediately and add any additional seasonings.  I have added additional Italian seasoning at the end if I used the rosemary and thyme sparingly.   Enjoy!

Recipe inspired from Swanson Chicken Broth: http://swanson.campbellskitchen.com/recipe/golden-chicken-autumn-vegetables/


Leftover Brisket Chili

brisket chili

One of our favorite weekend traditions is visiting Smoque, a BBQ restaurant that has amazing Brisket Chili.  Since we had about one pound left of brisket, I decided to try my own homemade recipe.  I used a receipe from the Food Network as a guide, and wanted to minimize the additional ingredients I needed to purchase at the store.  I adjusted the recipe considerably, (see below) and will continue to tweak the spices.  Although I was looking for a recipe with a “kick” next time I will test out a recipe with more oregano, basil, onion powder, thyme and less cumin and cayenne.  I also may test cocoa powder and omit cinnamon until the chili has begun to simmer for at least an hour.  I also enjoyed the coffee and will experiment with different types to see what provides the best flavor.  For this version I used the daily brew of allegro coffee from Whole Foods.

If you want to scale back the kick, try cutting the first four spices below in half, and additional seasoning as the chili continues to simmer.  For those that love spicy chili with a heavy cumin taste, this recipe is for you!

brisket chili spices

Ingredients
1 pound beef brisket, cut in 1-inch cubes
2 Tbsp olive oil
1/2 medium sweet or yellow onion, chopped
2 large garlic cloves, minced
1 Tbsp chili powder
1/2 Tbsp red pepper flakes, crushed
1/2 Tbsp cayenne pepper, or to taste
1 Tbsp ground cumin
1 green pepper, seeded and diced
1/4 tsp paprkia
1/4 tsp cinnamon
2 bay leaves
6 small roma tomatoes, chopped with their liquid
12 ounces Pomi diced tomatoes
2 (5.5 oz.) cans tomato juice
Salt and freshly ground black pepper
1/4 cup strong coffee
1 (15-ounce) cans kidney beans (strain half the juice)
1 Tbsp chopped basil leaves

Optional:
Cheddar jack cheeseSliced avocado
Tortilla chips
Diced tomato
Thin Spaghetti

Before You Begin Cooking:
Recommend chopping tomatoes and green pepper in advance, set aside.   Combine chili powder, pepper flakes, cayenne pepper, cumin, paprika and cinnamon in a small bowl; set aside.   Remove brisket from fridge and cut any fat from the meat; cut into inch size pieces.

Add olive oil to a dutch oven, heat on medium heat until oil shimmers.  Add onion and garlic and cook until translucent, about 3-4 minutes.   Add the dry spices and saute for 1 minute, until the onions are evenly coated.
Add the green peppers, bay leaf, tomatoes with their juice, the reserved meat, 1 tsp of salt  pepper (or to taste) and bring to a boil.   Reduce the heat, cover the pot with a tight fitting lid and simmer for 1 1/2 hours, stirring occasionally. Taste and add additional seasoning taste.   Add the coffee, cover the pot and simmer for 30 more minutes.

Add the kidney beans and basil, and simmer for an additional 30 minutes. Transfer the chili to a large serving bowl and serve with your favorite toppings such as cheddar jack cheese, diced tomato (reserve an additional tomato to chop at the end), tortilla chips and avocado.   You can also serve with sour cream but recommend omitting this to cut calories.   For those from Cincinnati, you can also pour the chili over cooked, thin spaghetti.

My official taste tester liked the chili and went for seconds and even thirds, but recommends taking a PEPCID before chowing down on this meal due to the intensity of spices!

danny tasting chili3

To see the original Food Network recipe, click here.


Braised Beef Brisket

IMG_1138

Brisket is one of my favorite meals to braise in the oven, cooking slowly for several hours.  It is a great Sunday meal or perfect to simmer in the oven for a few hours if you have errands to run or a longer cardio session during the week.  Brisket is generally a tough cut of meat but with a little love can turn into a delicious, tender dinner.  Cooking the meat at a lower temperature in a dutch oven (my favorite cooking pan), allows the meat to slowly break down the connective tissues as it braises in liquid.

IMG_4895

I like to cook the meat about 1 hour per pound, basting every 90 minutes to an hour.  If the meat is not cooked long enough, the brisket will remain tough.  When using tomato juices in the liquid, make sure to layer the top of the pan with parch paper and then tin foil as the acidity of tomatoes can cause a reaction with aluminum foil, causing small pinholes in the foil.

INGREDIENTS

    • 1 (3-5-pound) brisket of beef
      • Can also substitute chuck roast
    • salt, pepper seasoning to taste
    • 1 garlic clove chopped or 1 tsp garlic seasoning
    • 1 tsp sweet paprika
    • 2 tablespoons grapeseed oil (higher smoke point than olive oil)
    • onion, celery, carrot mix peeled and diced
    • 1 (26.46 Ounce) Pomi chopped tomatoes
    • 2 cups red wine (medium body) (I used Sleeping Bear Red)
      • This wine is a Burgundy-style blend of five different grapes, light-to-medium bodied with definite tart cherry and red-currant flavors.
    • 1 cup chicken broth
    • 2 bay leaves
    • 1-2 sprigs fresh thyme, chopped
    • 1-2 sprigs fresh rosemary, chopped
    • 6 to 8 carrots, peeled and sliced on the diagonal
    • 6-8 medley of small yellow, red, and purple potatoes, quartered
  1.  Remove the meat from the fridge and let come to room temperature, about 30 minutes.
  2. Preheat the oven to 325°F. Sprinkle salt pepper to taste over the brisket and rub with the garlic and paprika.
  3. Heat the grapeseed oil until it shimmers, then sear the brisket on each side (2-4 minuter per side) until browned.  Remove brisket from the pan and set aside.
  4. Add onions to pan and cook until softened and begin to caramelize.
  5. Add the brisket back to the pan, fat side up (so fat can seep into meat while it cooks).
  6. Add the chopped thyme, rosemary and bay leaves.
  7. Pour tomatoes, broth and wine into the pan and bring to just a boil.
  8. Cover (don’t forget the aluminum and parch paper!) and transfer to oven; bake in the oven (1 hour per pound), basting hourly with the pan juices.IMG_1132Snapchat-8494526538160828331-169x300
  9. With an hour remaining add the carrots and potatoes, continue cooking until both meat and vegetables are fork tender.
  10. To test if the meat is done, place a fork in the brisket and see if it slowly pulls away from the meat when removed, or “falling off the fork”.
  11. Remove the meat from heat, place on a cutting board,  venting tin foil over it for 10 minutes to cool.
  12. Place the pot back on simmer burner to keep vegetables and sauce warm.
  13. Cut the brisket against the grain, serve with sauce and vegetables.IMG_1140 IMG_1141 IMG_1144 IMG_1147

Clean out the Pantry Oven Baked BBQ Chicken


bbq-baked-chicken

Have you ever cleaned out your pantry and realized you have a surplus of a few items?   This was the case for me this weekend as I realized I had 5 bottles of BBQ sauce in my cabinet.  Solution?  Juicy, oven baked chicken with roasted vegetables and baked potatoes.   I adapted this from the below recipe, but recommend longer cooking times and for those who love paprika, closer to 2 tsp for the marinade.  If you don’t have fresh garlic on hand, you can use dry, minced garlic seasoning.  In addition, the sauce at the bottom of the dish can be used as a sauce to serve over the chicken for additional flavor.

I also recommend using the juice from half a lemon in the marinade, using a lemon squeezer.  Then use the remaining half of the lemon to squeeze over your choice of vegetables to roast in the oven along with olive oil (use sparingly), salt and pepper to taste.

Ingredients:

  • 2-4, bone-in Chicken Breast Halves
  • 3 tbsp olive oil (for 2 breasts recommend 1 tbsp)
  • 1½ tsp smoked paprika
  • 2 tbsp fresh lemon juice
  • 3 cloves garlic, minced
  • ½-3/4 tsp kosher salt
  • pepper to taste (course, ground black pepper is my favorite)
  • 1-2 cups favorite prepared BBQ sauce
Instructions:
  1. Combine olive oil, smoked paprika, lemon juice, and garlic in a small bowl.  Add salt and pepper to taste.
  2. Place the chicken in a Ziploc bag and add the marinade.
  3. Let chicken marinade for at least an hour, up to 24 in the fridge.
  4. Preheat oven to 350 degrees
  5. Remove chicken from bag and place in a shallow baking dish covered with aluminum foil for easier clean up.
  6. Bake for 30-40 minutes, depending on size of chicken.
  7. Remove chicken from oven and brush a layer of BBQ sauce on the chicken.
  8. Return to the oven and repeat brushing with BBQ sauce every 10 minutes until the chicken is cooked through, about 20-30 minutes longer. Chicken is done when it reaches an internal temperature of 165 degrees F and juices run clear.

**Recipe adapted from:
www.heatherlikesfood.com/super-moist-oven-baked-bbq-chicken/#CIzovS6eX0sOWVsf.99


Caramelized Brown Sugar Chicken

I really love cooking with brown sugar as a rub but never tried using brown sugar as part of a sauce.  The brown sugar and honey caramelized, creating a sweet crispy layer on the outside while sealing in the savory garlic taste.  The chicken broth allowed the chicken to braise while baking, keeping the meat moist and collecting the drippings from the brown sugar, honey and spice topping.  For those looking to cut calories and fat, you can try this with boneless skinless thighs.

  • 4 bone-in, skin-on chicken thighs
  • 1/2 tsp of paprika
  • Kosher salt and freshly ground black pepper, to taste
  • 2 Tbsps unsalted butter, divided
  • 2 cloves garlic, minced
  • 1/4 cup brown sugar, packed
  • 1 tablespoon honey
  • 1/2 teaspoon dried oregano
  • 1/4 teaspoon dried thyme
  • 1/4 teaspoon dried basil
  • 1/2 cup chicken broth
  • 2 tablespoons chopped fresh parsley leaves

Instructions:

  • Preheat oven to 400 degrees F.
  • Season chicken thighs with paprika, salt and pepper to taste.
  • Melt 1 Tbsp butter in a cast iron skillet over medium high heat.
  • Add chicken, skin-side down, and sear both sides until golden brown, about 5 minutes per side.
  • Remove chicken from heat and place in a baking dish lined with tin foil.
  • Melt remaining Tbsp butter in the skillet. Add garlic, stirring frequently, about 1-2 minutes.
  • Stir in brown sugar, honey, oregano, thyme, and basil until well combined, cooking for 2-3 minutes.
  • Once warmed, the mixture will be sticky; take a spatula and evenly coat the top of each chicken piece with brown sugar mix.  The sauce will be thick; try your best to spread it evenly across the top of each thigh.
  • Pour the 1/2 cup chicken broth in the baking dish; do not completely cover the chicken but leave about an inch of liquid at the bottom of the dish.
  • A small amount of the brown sugar mix will drip to the bottom of the baking dish to combine with juices, oil, and chicken broth making a delicious sauce.
  • Place into oven and roast until completely cooked through, reaching an internal temperature of 175 degrees F, about 30-40 minutes.
  • Let chicken stand 3-5 minutes and serve immediately, garnished with parsley, if desired.

Inspired from below recipe:

damndelicious.net/2014/11/29/garlic-brown-sugar-chicken/

Hummus Chicken with Butter Thyme Fingerling Potatoes

hummus

I wanted to try something different for a baked chicken recipe and this was the perfect weeknight solution.  The hummus cooked with the vegetables made for a yummy sauce mixed with the olive and seasoning.  I made additional steamed green beans and potatoes as a side and will make again soon!   This will be my solution to leftover hummus after serving as an appetizer when we have friends over so it doesn’t sit in my fridge for weeks!

Ingredients:

  • 4 boneless, skinless chicken breasts
  • salt and pepper
  • 1 zucchini, chopped
  • 1 yellow squash, chopped
  • 1 cup mushrooms, chopped
  • 1 cup hummus, (I used whole foods store bought)
  • 1 Tbsp. olive oil
  • 2 lemons
  • 1 tsp. smoked paprika
  • 1 tsp sweet paprika

Directions:

Preheat oven to 450 degrees. Prepare two baking dishes lined with tin foil.

Season the chicken breasts with salt and pepper. Cut up the zucchini, squash and mushrooms and place in baking dish and coat with olive oil, basil, salt and pepper.  You can also add 1/4 cup chopped onion.  Squeeze half lemon onto the vegetables and layer 2-3 tbsp of hummus over the vegetables.

Lay the chicken breasts in the second dish, then spoon the hummus on each chicken breast, coating both sides.  Squeeze the juice of the other half of the lemon over the chicken and sprinkle the top with smoked & sweet paprika.

Optional: Thinly slice the remaining lemon, and place the slices in between the chicken and vegetables.

Bake for about 40 minutes, and the last 5 minutes turn the broiler on to give the vegetables and top of chicken a roasted look.  Serve immediately,  recommend with fingerling potatoes.  If you aren’t afraid of  a little butter, see below recipe for braised fingerling potatoes.

  • 1-3/4 lb. fingerling potatoes, scrubbed
  • 6 large sprigs fresh thyme
  • 1 to 2 Tbs. unsalted butter
  • Kosher salt and freshly ground black pepper
  • 2-3 cups low sodium chicken broth

Cut the potatoes so they are 1 inch in diameter.  Arrange the potatoes in a skillet, ensure potatoes are not stacked on top of each other.  Lay the thyme sprigs between the potatoes. Cut 1-2 Tbs. of the butter into pieces. Add the butter, 3/4 tsp. salt, and a sprinkle pepper on the potatoes.

Pour over just enough broth to almost cover the potatoes (about 2 cups). Partially cover and bring to a gentle simmer over medium heat. Simmer, stirring gently once or twice, until the potatoes are tender when pierced with a skewer, about 25 minutes. (If the broth  dries up before the potatoes are tender, add another 1/2 cup, or add water.)

Transfer the potatoes to a serving dish. Increase the heat to high and boil the remaining liquid, uncovered, until it’s reduced to a buttery glaze, 5 to 8 minutes, depending on the amount of liquid. Remove the thyme sprigs . If you would like a richer sauce, add an additional Tbs. butter, but I didn’t find this necessary. Pour the glaze over the potatoes and serve immediately.

Adapted from below recipe: http://www.finecooking.com/recipes/braised-fingerlings-butter-thyme.aspx

Chicken Adapted from the below recipe:

www.gimmesomeoven.com/hummus-crusted-chicken/#_a5y_p=1169760